Showing posts with label trails. Show all posts

Sunday, October 5, 2025

Mt. Wolf (3,478 ft) 10-4-25

Distance: 13.1 mi.
Elevation: 2,660 ft (overall) 4,011 ft (total)
Time: 3:01 (Gordon Pond) 3:17 (Kinsman Ridge Trail) 4:24 (Mt. Wolf) 7:01 (Dilly Trail View) 7:36 (Total)
Trails: Gordon Pond Trail, Kinsman Ridge Trail, Dilly Trail (abandoned)

NOTE: The lower section of the Gordon Pond Trail has now been decomissioned, so this write up isn't as relevant as it was at the time. Please be careful if you are going to try and hike this section of trail as it is now not maintained or an official trail.

With some discussion about whether the Gordon Pond Trail is going to be closed on the lower end due in part to no place to park for it, I wanted to try and get a hike of it done while it was still open. I would rather check of a trail for redlining by actually hiking it rather than by having it close and no longer needing too. The original parking area for this trail was blocked off by the owner after people using it to swim in the river left too much trash around it. The trail also starts by basically walking up someone's driveway and right past their garage, so it is just a bit of an odd start to a trail. For my hike, I parked further down the road (east) at a pull off with ample room. I then walked up the side of the road to the driveway where the trail starts. With some intel from another redliner, I knew where I needed to go through the yard so that I could go through quickly without needing to wander around looking for the trail.

Once into the woods and on the trail, you find that it follows a dirt road through the woods that appears to still be used by someone who has maple trees tapped in this area for making maple syrup. This makes for easy walking until you get to the powerlines. The trail use to go straight after going under the powerlines, but now that there are more houses built on the road, it has been relocated and it now goes up the powerlines for a distance following an access road/path. There is a sign that makes it clear where you need to turn right to go back into the woods. This leads you back down so that you lose all of the elevation that you just gained. You will then turn left at another sign and continue on the original path of the trail.

The trail starts on a woods road that is still used

Turn back into the woods after going up the powerlines around some houses

At this point the trail follows and old railroad grade, so it makes for pretty easy walking and an easy start of the day. There were a couple wet spots of downed trees/branches to get around, but this was all good easy walking until reaching the powerlines again. Once I popped out onto the powerlines I turned right and followed the access road (snowmobile trail) until the bridge just a bit up the trail. I checked the map on my phone here (because it was acting up) and saw that I had gone past the trail. So I turned around and went back to where the trail comes out onto the powerlines again. Well, it turns out that the trail actually crosses here, but the vegetation was so grown up I didn't see that. There is a blue painted blaze on a tree on the other side of the powerlines, but the very narrow path leading to it didn't get my attention enough to see it. I pushed through the bushes, and was back on track into the trees again.

Following an old railroad bed

Less than obvious the trail actually crosses under the powerlines here

After getting back into the woods, the trail goes straight for a little bit until a sharp right turn that is marked by a plastic arrow sign commonly used for snowmobile trails. At this turn, the trail crosses a stream that was easy on this day with low water and plenty of rocks to step on. The trail then turns back to the left and follows what is an old woods road. This section of trail was wider than trails normally are and had a steady incline that kept you gaining elevation without being to difficult. This section was quite enjoyable and was a pleasant mix of green and yellow leaves as the foliage change hadn't fully taken affect yet in this area.

Stream crossing

Steady climbing on an old woods road

After plenty of easy hiking and climbing, the trail comes to the upper crossing of Gordon Pond Brook. While easy today with very little water, this crossing looks like it would be the trickiest part of the trail with spring melt or after hard rain. It isn't very wide, and the rocks slope down to the narrow path the water takes before sloping back up on the other side. This could be tricky (or slippery) with limited other ways around it. This brook crossing was interesting though because all of the exposed rock up stream from it makes it look like lots of water has come down through here at some time and it looks like it would have really been ripping through when it was.

Looking upstream at the upper crossing of Gordon Pond Brook

After the crossing, the trail still follows an old woods road as it gets closer uphill to Gordon Falls. The trail works past a small cascade in the brook on your left that I initially thought to be Gordon Falls, but after hiking further up, I believe Gordon Falls to actually be up where the trail crosses the brook as the trail levels out. At this upper section of falls where the trail crosses, there were some interesting old artifacts slowly being buried by leaves and dirt. The water crossing today was very easy, but if it were spring time or after a heavy rain, this could be trickier. The rocks where you cross are wide and flat so water probably wouldn't be super deep when running high, but the surface of the rock has lots of moss on it and it angles down stream, so it could be slippery with that water running over it.

Brook crossing at Gordon Falls

From the falls to the pond was nice easy walking as the terrain mostly levels out through here and there isn't really any climbing. It's just a plesant walk through the woods and along a small brook. You just need to pay attention for where the path to the pond breaks off to the right from the trail so that you don't walk right past it. The pond was a very pleasnt area and you can tell many people have spent the night in the area along the shore. It also provided a nice view up to Mt. Wolf, which makes it appear closer than the hike along the trail actually felt.

Mostly level from Gordon Falls to Gordon Pond

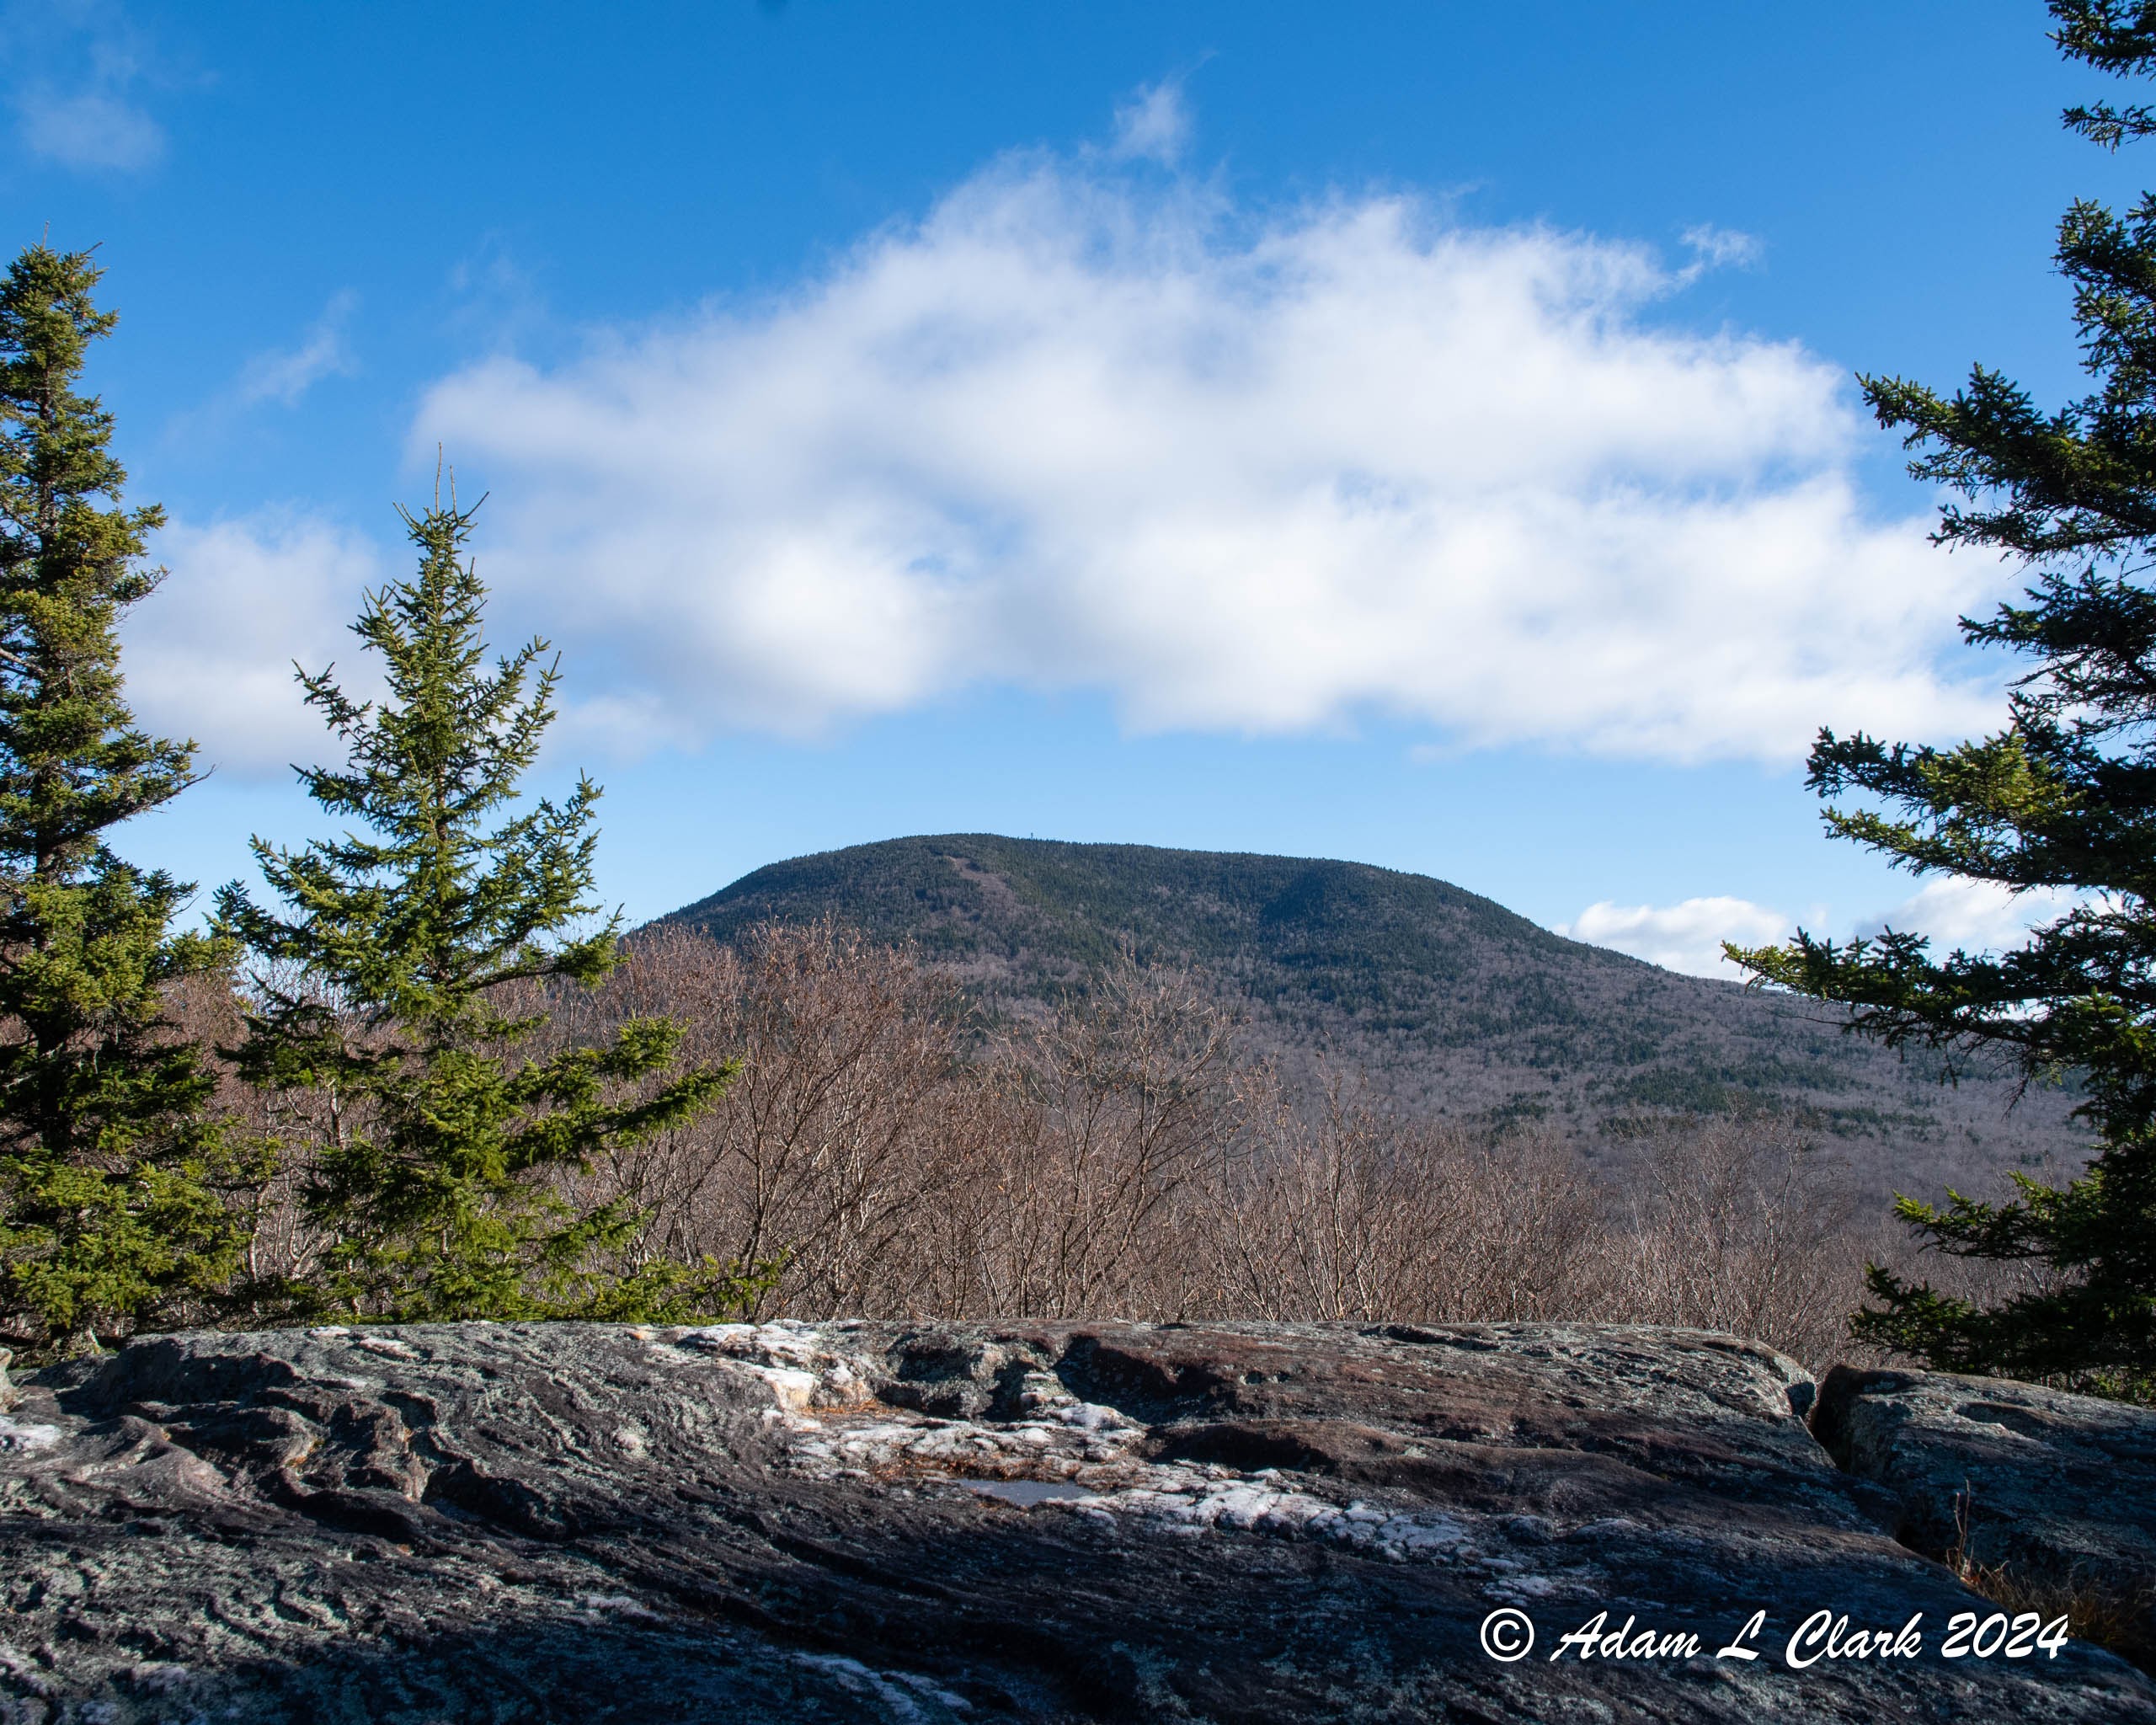
Gordon Pond with Mt. Wolf behind it

From the pond, it's a pretty easy and short walk to the junction with the Kinsman Ridge Trail. Just turning left here would have still made for a nice loop for the day, but I wanted to add in the out and back to Mt. Wolf from this side. This peak is a delisted peak from the NH 52 With a View list, but it can still be counted to the list since it was on it at one point. By hiking it from this side, I could get the trails on the other side by coming up from Reel Brook while hiking the Kinsmans or something similar. The Kinsman Ridge Trail is also the Appalachian Trail, so it was easy to follow and well marked.

Since the Kinsman Ridge Trail sees so much more traffic, the trail was now much rockier than the earlier sections I hiked today. The trail here does a mix of climbing and short level sections. It steadily works its way up to the ridge that connects a shorter subpeak and the summit of Mt. Wolf. It was starting to become pretty warm by this point of the day, so this section of trail was a bit slower going for me than I would have hoped. Before too long though, I was up on the ridge and it was an easy walk over to the spur trail that leads up to the small summit of Mt. Wolf.

Rocky section of Kinsman Ridge Trail with leaning trees

At the spur to the summit of Mt. Wolf

The summit of Mt. Wolf is a small opening in the trees. There was a group of 3 other hikers when I got there, and I was glad that they were almost done since there was so little space. Once they left, I had the summit to myself, but it was still hard no to be up against tree branches. With how limited the view has become from the summit, I can see why the peak has been taken off the NH 52 With a View list. The only really view is in the direction of Franconia Ridge, and you can't even see all of that above the trees without moving around. By looking through breaks in the branches, you could make out a few other summits like Cannon Mountain.

The small summit area of Mt. Wolf

The limited view from Mt. Wolf

If you are tall enough, you can see Franconia Ridge

After a while at the summit, I turned around and headed back towards the junction with the Gordon Pond Trail. This was very straight forward since I had just come through here. Unfortunately, after the junction, the trail had to climb uphill some more before finally descending down into Kinsman Notch. It starts with some steady climbing, before having a couple small ups and downs along the ridge the trail follows. With how warm the day was getting, this was taking a bit of a toll on me and I was slowing down through here.

Exposed rock section of trail coming back down to the junction

Some climbing up after the junction

On a downhill section before reaching the abandoned Dilly Trail, I finally took a nice 15 minute break in a shaded area with some soft ground to lay down on. I wish I had a spray bottle of water or something to cool myself off quicker, but laying on the cooler ground helped enough. After my break, I made my way to the now abandoned Dilly Trail Spur. This trail use to go all the way down to Route 112, but a forest fire did enough damage that the lower section was closed. Later on, the upper section was closed as well and the sign was removed. I knew what to look for to find the trail, but I didn't realize that it had been fully closed, so I didn't actually need to hike it at all today. Since I didn't know that until after, I made my way down the trail to the limited view point that is quickly growing back in. The trail was mostly easy to follow, but it is also clear it hasn't been maintained for a while. So I made my way slowly back uphill to the Kinsman Ridge Trail.

The abandoned Dilly Trail

Very limited view from the Dilly Spur

From the Dilly Spur Trail, it is all downhill until you hit Route 112 in Kinsman Notch. The trail gets pretty steep through here and it a little bit rocky. After as much climbing as I had done today, I took my time on my tired legs to make sure I didn't have any issues. I feel bad for the northbound AT hikers that have to climb this section, but then again the Whites aren't that easy on them at any point. I kept making my way downhill until I was finally at the crossing of Route 112. There is a nice parking lot here, and I had stashed my bicycle here earlier in the day on my way to my starting point. I took a bit of a break on a rock next to the parking area before finally hopping onto my bike. It was a long steady downhill ride all the way back to my truck. You can get some pretty good speed coming down the steeper sections of the road, but the road is in pretty good shape so I didn't worry much about that. It took me just 12 minutes to ride the nearly 5 miles back to my truck.

Steap rocky descent into Kinsman Notch

Google Earth representation of the hike

For all the pictures from the hike, just go HERE


Monday, November 11, 2024

Smarts Mountain (3,238 ft) 11-9-24

Distance: 9.76 mi.
Elevation: 2,086 ft (overall) 3,137 ft (total)
Time: 2:39 (Summit) 4:28 (Parking) 5:24 (Total - Stashed Bicycle)
Trails: Lambert Ridge Trail, Ranger Trail, Skiway Trail (Dorchester Road AT section)

For today's hike, I wanted to do something I haven't done before and focus again on redlining. I decided to hike Smarts Mountain as I haven't done it before, and since there are multiple ways to climb to the summit, I could use those when I hike it with other family members who will want to do so for their 52 With a View list. It also helped that I haven't done much hiking on the trails in the Hanover area, so I had lots of options to choose from. I picked today's route also based on the fact that I could use a different trail to come down than I did to go up. Since I knew that this hike was short enough it wouldn't take all day, I also added on a section of the AT known as the Skiway Trail which is right across the road from the parking lot. I stashed my mountain bike where this would come out on the way to the trail head so that I could ride it back to the truck instead of needing to walk the road or trail back to my truck.

The trail starts off from the entrance side of the parking lot with a nice steady climb with good footing to get you warmed up. There are a few show flatter sections mixed in that let you get a brief break from the climbs. The climbs however are not really steep, just steady to keep you going uphill. As you get further up the ridge, the trail starts to follow some exposed sections of rock which make for good grippy terrain with all the leaves on the ground while I was hiking. During this section you also get a couple views to the south and east.

Early section of the Lambert Ridge Trail


The trail following exposed rock


After the section of exposed rock, the trail goes back into the thicker trees more and follows pretty much right up the spine of the ridge. With the winds today, it made things feel much cooler as there wasn't much to block the wind from coming over the ridge and where you are hiking. Because of the wind though, I did have a cool encounter where a hawk that was trying to avoid the wind came buzzing right past me as it followed the trail exactly through the trees going down the mountain. It is the closest I have been to a hawk in the wild and I wonder if it really realized I was there.

The trail following along the top of the ridge has the benefit of one view point that provides a nice look at the summit ahead, although it does appear to be a bit further than you would think it would. As the ridge becomes a little bit less defined, the trail drops down some and enters back into a mostly hardwood area of forest. As it heads more to the east, the trail does soon again satart to gain more elevation and enter back into the softwoods that were more present on the ridge.

A view to the summit from the trail


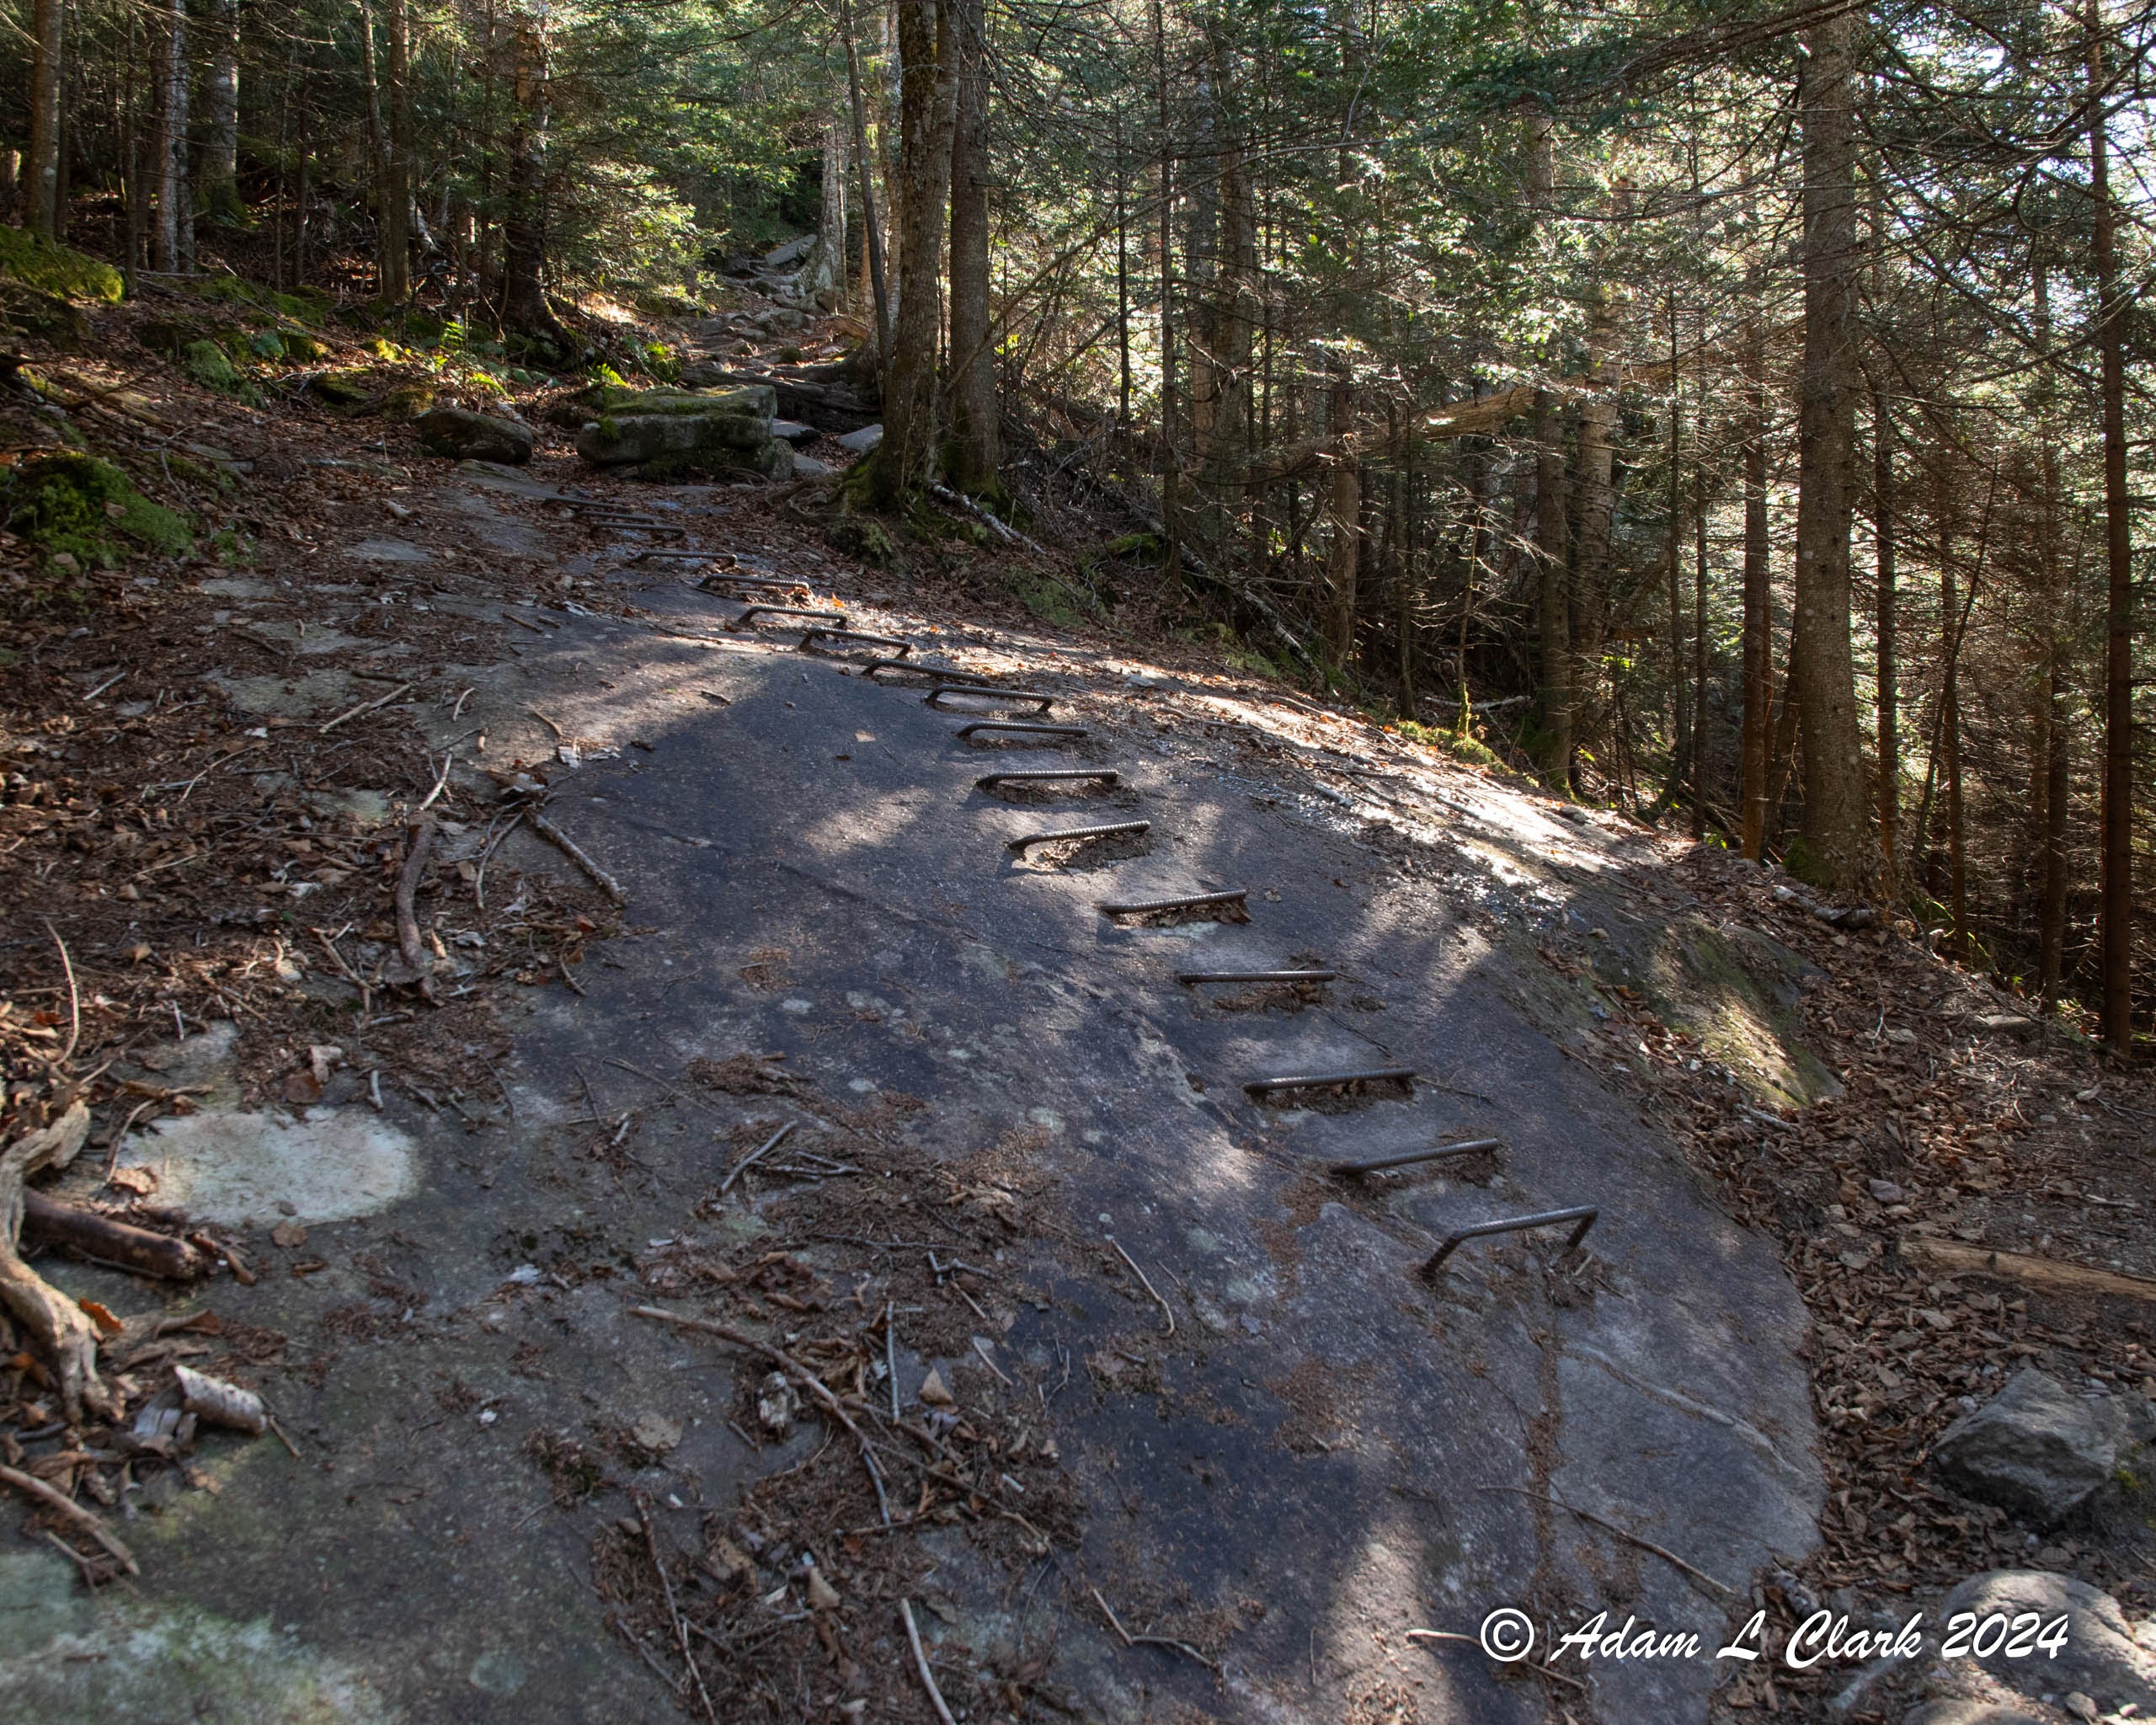
As the trail climbs up the summit cone, it becomes steeper and maintains this for a while until right near the top. There is still pretty good footing with natural terrain, some well placed rock steps, and of course the metal rungs that are attached directly into the rock that this trail is partially known for. There is a section of mostly smooth exposed rock that the trail goes up that could easily be very slippery if it was to become damp. To help hikers out here and prevent them from going off trail around this, there is a small set of wooden stairs (not quite a ladder) that lead to a section of bent metal rebar drilled right into the rock. The metal rungs could be used like a ladder with both hands and feet if you want, but I found it pretty easy to just use them like steps and stay standing up.

After this the trail works up the summit cone by following the side of the hill for a while, dropping off to your right. As it gets closer to the summit though, things level back out mostly and it becomes easy walking again. When I got to the summit, there were a few other people around and I could see at least one person up in the fire tower. Since the cabin of the tower is pretty small, I figured I would wait my turn by going over to the other ranger cabin to check that out. Doing so also gave me a nice place out of the wind to adjust my layers.

Wooden stairs just before metal rungs to help hikers up the rocks


Metal rungs in the rock


Old ranger cabin at the summit


After fully checking out the cabin, I headed back the short distance to the base of the tower. The other hiker up there was on his way down, so I would be able to go up and have plenty of room to check out the views and take pictures. The stairs up the tower are steep like most towers, but the railings a nice and secure on both sides. With the winds today, it was nice to have something to hang on to in order to feel a bit safer. The door into the cabin is unlocked, so you can enter easily, but it also was a bit heavy and didn't want to stay up without you holding it, which makes entrance and exit a bit trickier in the wind.

Fire tower at the summit


I spent a good amount of time in the tower taking pictures and looking around. The views today were great and it was nice to be able to see in all directions. It was clear enough out that you could make out snow on some of the bigger mountains further up into the Whites like on franconia Ridge and the Presidential Range.

Looking out from the fire tower


The Presidential Range with snow in the distance


View northeast from the fire tower


To descend the mountain, I started back the way I came up, but now headed down the Ranger Trail. This trail didn't seem too steep, but looking at my GPS data, the elevation profile makes it look steeper than it felt. Footing on this trail was good while descending the first half with just a short section that was a bit rocky making for more careful foot placement. Getting further down the trail, it does have one stream crossing that was easy to do on rocks today. At this crossing is an old garage looking structure that I suspect had to do with the rangers that use to use the cabin and fire tower at the summit. From this building to the trail head is basically old woods roads and could have easily been driven with a small truck or ATV type vehicle. It could have then been parked in the building before the rangers hiked up, which would have saved them time and effort.

Coming down the Ranger Trail


Stream crossing on the Ranger Trail


After this building and stream crossing, the trail follows and old woods road and is quite smooth and wide. There was just a bit of mud in a couple places, but I was able to cruise right along through here and make very good time.

Lower sections of the Ranger Trail mostly look like this


Once I got back to the parking lot, I stopped at my truck and adjusted some of my gear for the next section of trail. I wasn't going to need extra gear for the higher elevation and winds, and could put a bit more fluid back into the bladder in my pack. The winds had died down, and I was back down lower in the trees. There wouldn't be much elevation change either, so I shouldn't work up much of a sweat while hiking.

I crossed the road and easily found the trail I was going to hike down. It was easy to follow as you would expect from the AT. The trail starts with some uphill gain and then a small brook crossing. After this it stays up on the hill for a while before very gradually going downhill. Going this direction, the trail losses more elevation that it gains. It was an enjoyable hike going out this way and I didn't run into anyone else through here. I didn't expect too as it is well past the thru hiker season. Where the trail comes back out to the road, I found an out of sight area to stash my mountain bike so that I could ride back to my truck. This is the second time this fall I have done this, and while it is much quicker than walking back, I am finding I have been too long without much bike riding and the hills definately user different muscles than walking through the woods does.

AT trail marker while doing some extra hiking


Google Earth representation of the hike - clockwise loop with extra
Bike ride back to truck not shown


All in all today was a very pleasant hike and I look forward to coming back from other directions with my daughters for their hiking of the list as well.

For all the pictures from the hike, just go HERE


Monday, June 3, 2024

Hedgehog Mountain (2,543 ft) 6-1-24

Distance: 5.82 mi.
Elevation: 1,230 ft (overall) 1,669 ft (total)
Time: (with a 5 and 10 year old setting the pace) 2:23 (Ledges) 3:19 (Summit) 5:02 (Total)
Trails: UNH Trail

For a family hike with my wife and both daughters, we picked Hedgehog Mountain accessed from the Kancamagus Highway. This would be a new peak for all of us and with that, some new trails for me to add for redlining. This hike uses just one trail, the UNH Trail, which splits and forms a loop. My plan was to do this loop clockwise so that we could hit the ledges before we got to the summit.

This hike starts off from the Downes Brook Trailhead with the UNH Trail going off to the left almost immediately. It follows what appears to be on old railroad grade which makes for easy walking to start getting yourself warmed up. After about 0.2 miles, the hiking trail breaks off to the right. It starts to gain more elevation now, but it is still pretty easy hiking. After about 0.5 miles of this, you get to the split in the trail and can choose which direction you will go.

The split in the trail with signs giving directions

As planned, we took a left at the split. The trail losses a little bit of elevation in this direction before starting to gain elevation again. This side of the loop starts with good footing on the trail which then goes away some for parts of it as it gets more rocky or has more roots in the trail. All in all though, it stays pretty good for a trail in the White Mountains though.

Gaining elevation while surrounded by green

A short root filled section of trail

While on our way up the trail getting closer to the ledges, there was a small viewpoint on the left of the trail that made for a nice shaded area to have a rest and a snack to keep everyone's energy up. After our break, we got moving again and were soon at the start of the exposed ledges that this hike is known for. We took another much longer break here after finding some nice rocks to sit on in the shade. Everyone, especially the kids, thought the view here was great. The open ledges do provide a nice view, and it is nice after the close up view of Mt. Passaconaway from a side other than the south that most hikers see if from.

Mt. Passaconaway from the ledges

View east from the ledges

After this longer break, we got moving again and followed the trail along the sections of open ledges. As noted in the guide book, care should be taken through here to make sure you are staying on the trail. While in the open, the trail makes a left turn without much for markings on the ground. If you aren't looking for the markings that start going to your left, you are likely to go straight like my wife and daughters did in this area. The open area through the small trees does make it appear that the trail goes straight, but very quickly you come to a spot where the trail just seems to have stopped. We went back just a bit, and after looking for more yellow blazes, were able to see where the trail actually turns left and heads back into the trees.

In the area where the trail makes a left without much indication

Leaving the ledges, the trail drops down in elevation a little before maintaining a consist elevation for a while. As the trail loops around to the right more after going mostly straight, it starts to gain elevation quickly. This is probably the steepest section of trail for the day. This steeper climb leads you up to the summit though and once it levels out some, you are near the high point for the hike. As we went up the trail and crossed over small ups and downs, we tried to determine which spot was the highest. Based on the description from the trail guide, we decided a small opening to the left of the trail was the high point. We took a nice long break here to have lunch and rest our bodies some.

An interesting rock face next to the trail

View from the summit

View from the summit

Family photo

The hike down was a pleasant one with my daughters playing a game of seeing how many trees they could find that had a painted blaze on both sides of them. There weren't any overly difficult sections of trail to slow us down. There were some partial views through and over the trees after leaving the summit, and the short side trip up the path to Allen's Ledge was worth the effort. This was the best view of the descent and it wasn't too hard to climb up to.

A bit of a view shortly after leaving the summit

View from Allen's Ledge

After Allen's Ledge, the remainder of the hike out went very smoothly with everyone's mood staying good while we had a easily walk back to the car. After the trail joins back up to itself, we knew exactly what to expect and were able to keep moving at a good speed until we got back to the car where a big jug of ice water was waiting for all of us.

Google Earth representation of the hike

For all the pictures from the hike, just go HERE


Wednesday, October 18, 2023

Mt. Morgan (2,213 ft) & Mt. Percival (2,200 ft) 10-15-23

Distance: 6.8 mi.
Elevation: 1,353 ft (overall) 1,960 ft (total)
Time: (with an 5 and 9 year old setting the pace) 3:31 (Ladders) 4:06 (Mt. Morgan) 4:55 (Mt. Percival) 5:40 (Bottom of the caves) 7:31 (Total)
Trails: Mt. Percival Trail, Morse Trail, Mt. Morgan Trail, Crawford-Ridgepole Trail, Mt. Percival Trail

The plan for today's family hike would be a clockwise loop of Mt. Morgan and Mt. Percival. We would go up the ladders and down through the caves as both of our daughters wanted to explore both of these sections when I let them pick which hike we would be doing today. To start the hike we drove past the parking lot for the Mt. Morgan Trail since it looked pretty full and instead parked at the lot for the Mt. Percival Trail which had only a couple cars in it today. My plan was to use the Morse Trail to connect the two sides of the hikeno matter which parking lot we started at, so we just picked the easier one to park in.

We made our way out from the parking lot using the wide flat trail until we hit the junctions with the Morse Trail. This trail was easy to follow and didn't gain or lose any real elevation. Once we hit the Mt. Morgan Trail, I quickly hiked to the parking lot and back just to cover the entire trail for redlining purposes while everyone else had a snack. This was very quick as you can almost see the end from the Morse Trail. We then headed up the Mt. Morgan Trail which starts off pretty wide and gentle. You gradually gain elevation which short climbs mixed in with flatter sections as well. The closer you get to the top of the trail and the Crawford-Ridgepole trail, the steeper it will get though.

The girls where the trail crosses a stone wall


A steeper section of the Mt. Morgan Trail


Once onto the Crawford-Ridgepole Trail, it is a nice hike with more sections of uphill and brief flats until you reach the junction where the trail splits to reach the summit. To the right is the easier route, and to the left is the harder route which will have you climb up some ladders, through a small cave/tunnel, then up some exposed rocks to the cliffs with great views just before the actual summit. With my daughters both wanting to climb the ladders, we went left. The ladders shouldn't be too hard for any adult unless you have issues with heights or steep drops. The actual manuevering on the ladders was only tricky for our daughters as they have shorter legs. There is one spot where you have to climb up and to the right to get onto the next ladder and their legs were just a bit short for that so I helped both of them in this spot.

The girls getting to the base of the ladders


Me helping the girls up the ladders


At the top of the ladders that trail goes through a short cave/tunnel and then pops out into an open area of rock. The trail does almost a 360 degree turn as you come out from the tunnel where you turn left and climb across a rock that helps make the tunnel under you. From here the trail follows up the exposed rocky area with some trees until you reach the opening at the top where you have great views out over the lake. We stayed here to rest and eat some lunch while we enjoyed the views. Just after you leave this spot, a short side path leads to the actual high spot of the mountain.

Where the cave at the top of the ladders emerges


Lunch with a view on Mt. Morgan cliffs


Liliana and Madison on the summit of Mt. Morgan


After leaving the summit of Mt. Morgan, the 0.8 mile hike over to Mt. Percival was pretty gentle and easy going with nice footing. There are some ups and downs between the peaks, but nothing too big. There is one final push up a steeper rocky section of trail just before the summit of Mt. Percival. My youngest daughter was starting to not have fun when we came to this section, but the reward of more views and another summit just beyond it cheered her back up.

View from Mt. Percival


All three girls at the summit


Once we were done resting and taking pictures at the summit, we headed down the trail to the right of the main view so that we could go down through the caves. We were all looking forward to seeing what they would be like. The trail is steep from the start and begins with a couple sections that are just a bit narrow or awkward to climb down without hitting your pack on rocks around you. Then you climb over some large rocks with gaps between them, so you need to keep watching your footing. Next you climb into the first part of the caves after climbing over a deep gap in the rocks. The trail then goes through a small opening in the cave leading into a lower large opening in the caves. I took my pack off to go through this opening, but I think both of our daughters were able to fit through fine with their packs on. After passing through the opening in the caves, you come out through a small hole in the rocks and back out into a completely open area again. This whole section went slow, but I was also going first myself so that I could see where the trail went and then find a good place to stand so that I could help out our daughters and my wife as needed over/down/around the obstacles. Once we were through, everyone agreed it was fun to come through the caves.

Melissa working her way through the caves


Madison emerging from the caves


Just after the caves is where the trail joins back up with the option that goes around the caves. We turned and headed down the trail which descended pretty well before getting more gradual. The trail was a mixture of smooth sections and rocks with the rocks winning out more of the time. There was also a spot where the trail crossed over a small boulder field of decent sized rocks where our oldest daughter had fun climbing from rock to rock to make her way across.

The girls traversing a boulder filled section of trail


As the trail gets lower, it becomes smoother and less steep. This would normall make for a nice section to cruise right along at, but our youngest daughter was getting a bit tired (she didn't drink enough during the day) and she kept tripping over small roots and rocks so we took a more leisurely pace through here. Eventually we made it back to the end of the trail and our waiting vehicle so that we could take off our hiking shoes and boots and get into something more comfortable while we went and got something to eat.

All in all this hike went pretty well and everyone enjoyed the ladders, the caves, and of course the views. This made for a nice family hike and others could certainly do the same. I would be more than happy to go back and do it again, and if I did, I would probably go the same direction unless I was going to go around the ladders as I think it would be easier going up the ladders than it would be coming down them. I think the caves could be done about the same in either direction though.

Madison taking a break at a brook crossing


Google Earth representation of the hike


For all the pictures from the hike, just go HERE