Sunday, January 7, 2024

Mt. Cabot (4,161), The Bulge (3,945 ft), & The Horn (3,900 ft) 8-20-23

Distance: 17.1 mi.
Elevation: 2,665 ft. (Overall) 4,431 ft. (Total)
Time: 0:38 (Bunnell Notch Trail) 3:37 (Cabot Cabin) 3:51 (Cabot Spring) 4:10 (Mt. Cabot) 4:45 (The Bulge) 5:15 (The Horn) 9:10 (Total)
Trails: York Pond Rd, Bunnell Notch Trail, Kilkenny Ridge Trail, Cabot Spring Spur, The Horn Spur, Mill Brook Trail

I was going to be up north for the start of the weekend so I took advatage of this to hike a loop of the northern most 4K and two of the New England Hundred Highest peaks. I made this into a bigger loop than normal so that I could get in some good redlining miles while I was at it. The worst part of doing today's loop would be the approximately 2 mile road walk between the two trail heads. Because I didn't want to end the day with a boring road walk, I decided to start the day with it so that I could end my hiking at my truck.

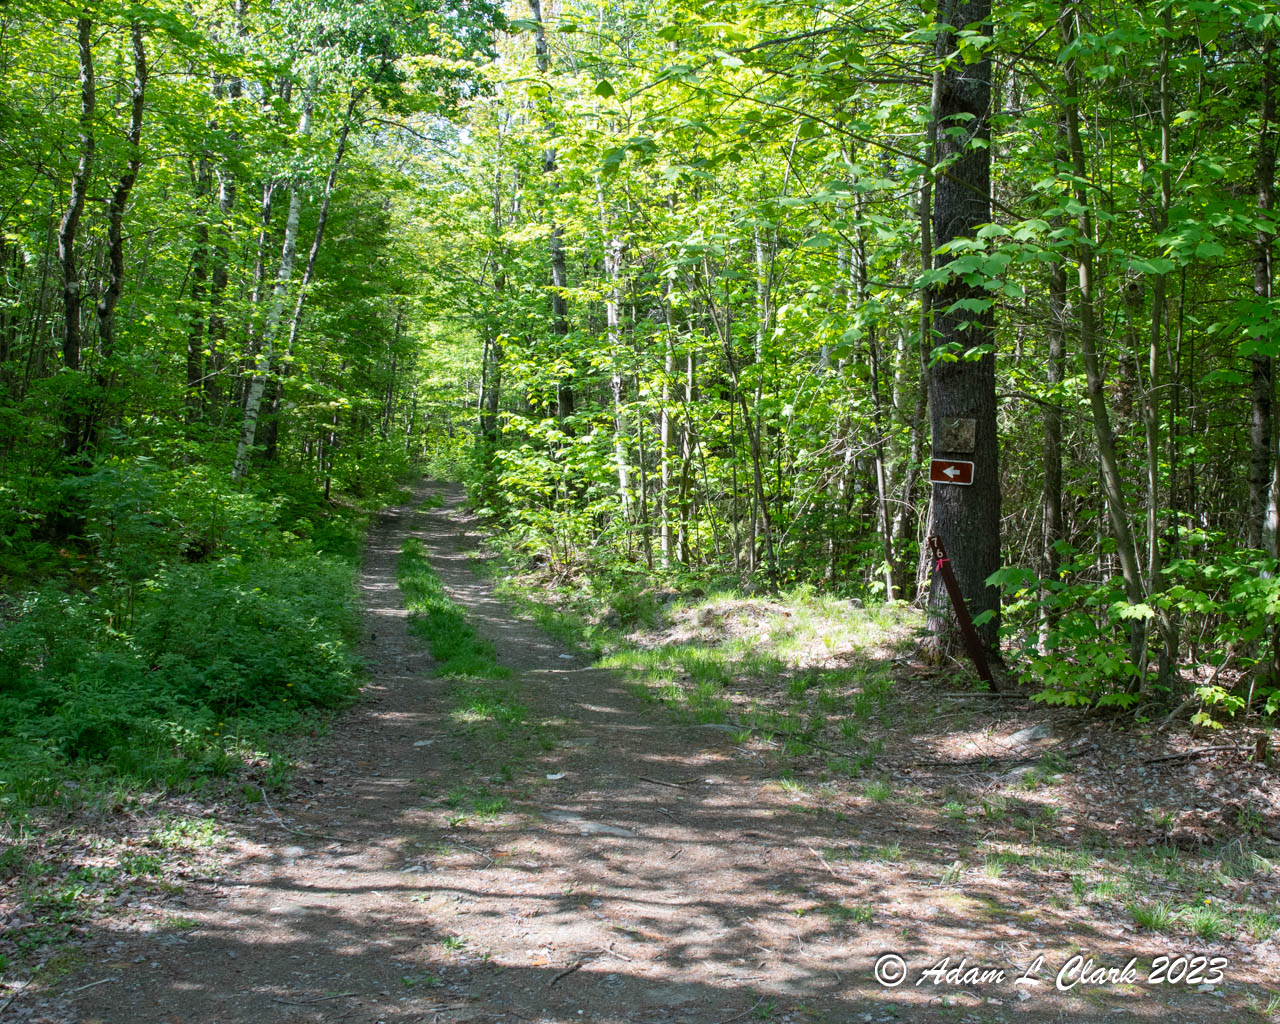
The road walk felt quicker than expected and I was soon (enough) at the other trail head and turning off the road to start the hiking. Today the trail started off dry down low other than minor mud. Since this year has been so wet this summer, that was a nice start, even though it wouldn't last. Once the trail makes the 90 degree left turn a way up it and it starts to actually gain some elevation, things got a bit more wet. It still wasn't bad with standing mud or anything, but you could tell things were just a bit more damp. Once I had had followed along the brook up through Bunnell Notch more and started to gain some real elevation the trail really started to get wet. As I was now hiking through the clouds some, at times the trail was more like a small brook. The water flowing down the trail never got very deep, but it was still running down the trail covering the surface and where you would want to walk.

The trail was wet in many places

The first really wet section was at the junction with the Kilkenny Ridge Trail near the height of land in Bunnell Notch. There was lots of standing water right in the trail here and you either had to make your way around it or just get wet feet. Now the trail was a mix of some standing or running water in the trail and also that of wet rocks. I didn't have any problems with slipping on wet rocks or anything, but it could be a possibility. On the way up the trail I stopped at the view point at Bunnell Rock where I was treated to a view of the inside of the clouds. This is a nice little spot, but not so much today. After this the trail seemed to go quicker and before I knew it the trail was leveling out some and I saw the outhouse for the Cabot Cabin just before rounding the corner to the cabin.

Cabot Cabin

I took a nice break at the cabin to get out of the breeze a bit and adjust my gear some. Inside the cabin is a small map that included where the spring for the cabin is. This provided some nice reassurance as the first bit of redlining for me today would be the spur to the spring. I didn't know it existed the first time here so I didn't hike it, and the second time was winter and it didn't make sense in all the snow. The Cabot Spring Spur is a little ways past the cabin before you get to the summit. There is a wide section where the trail makes a bit of a left turn. The spring heads off to the right and there is a small sign on a tree that is most easily seen when heading from the cabin towards the summit. The spur isn't super wide or noticeable if you aren't looking for it and has the appearance of being a bit better than just a herd path into the woods. The spur ends up being more of a herd path than an actual trail all the way down to the spring. It is narrow, tight, and you do have to climb over a couple downed trees on the way down. The worst part is probably just how much elevation you lose hiking down in such a short distance. This makes coming back up that much more tiring. And if you are just redlining and don't really need the water, it seems more like a waste. Perhaps leave most of your gear near the start of the spur. The spring was flowing well today though, and the white pipe in the ground makes it easy to tell you are in the right spot.

Cabot Spring

Cabot Spring Spur is steep and narrow

After coming back up from the spring, I did the short and easy hike over to the summit of Mt. Cabot. The actual high point is just behind the sign that is in a large open area of the trail. There is a small cairn just into the trees following a short path past the sign. I took a short break here since I had taken a longer break at the cabin. Plus the clouds were starting to break up some and conditions were getting nicer. I was at the highest point of the day, but still had lots of hiking left to do.

Mt. Cabot

Coming down from Cabot and heading towards The Bulge the trail always feels to me that is turns further to the right (east) than it actually does and it always messes with me somewhat through here. Despite this though, the hike over to The Bulge went pretty quickly and soon I was at the viewless summit that only has a small cairn marking the top which someone could pass right by without really knowing what it was. Part of the descent of The Bulge is a little bit steep and had a tree that had fallen across it. This had the nice surprise though of being where I crossed paths with some my other hiking friends. With the unpopularity of Mt Cabot and even more so going past it to the Bulge and the Horn, it wasn't surprising that I only ran into other people I know that are working on either redlining or their grid of the 48 4Ks.

Soon the trail levels off more and becomes a nice walk to the junction with the trail leading up to the Horn. This trail starts off good and gets steeper as it goes on. Near the actual summit the trail seems to split and go mutiple directions up and over the rocks to get you to the top. At least one of these paths kind of forces you to go through the trees which are a bit tight to get to the top. Once at the top, the real high point is the top of a large exposed rock. This rock is a bit hard to climb up though to get up on top of it. You might need to check out a couple different spots to find which out which one allows you to get on top of it.

The Bulge

View from The Horn

After leaving the Horn it was time to make my way to Unknown Pond. The hiking through this section is pretty gentle without any real big ups or downs. Of course I was also going downhill for any of the elevation change. This was the time of day I started to encounter the most water though other than the water running down the trail near Bunnell Notch. Through here, there were lots of muddy spots with standing water in places as well. There were some bog bridges going over the water, but plenty of places to get your feet wet through here today. After Unknown Pond, the trail goes uphill again for a little bit slowly gaining some elevation. You will then go through a section where there was lots of ferns on both sides of the trail making it feel a bit narrow, but it was still easy to follow. After the ferns, the trail starts to drop downhill steeper than I was expecting and it keeps going for longer than I expected too. After the descent, the trail becomes mostly flat again which also means wet again. There are a couple places where it crosses the edges of some small ponds or bogs. One of these was easy with a bog bridge that was slightly sunken. Another one of these resulted in wet feet as what is left of the bog bridge is at a spot where the beavers have built a dam as well. The crossing starts off ok, but the end of it is basically walking on the beaver dam as there are no more bridge sections and the sticks rolled under my feet resulting in me stepping into the water and mud to keep from falling in.

Crossing the water

You'll likely get wet feet here

After the last pond/bog crossing, the trail all of a sudden widened up. Clearly someone had recently done some trail maintenance through this section. This made for some nice walking to the junction with the Mill Brook Trail. Starting down the Mill Brook Trail required a brief uphill climb leaving the intersection before things leveled out. Once heading back downhill, the trail is a long gradual decline all the way back to the parking area. It follows a bit of a sidehill higher up, then comes down closer to the brook where it then follows along the bank for quite some time as well. This trail had more wet sections just like much of the day had. At least now I already had soaking wet feet and didn't care if I stepped in more water since I knew I had dry shoes back in my truck. At the very bottom of the trail you come to a small pond with a small dam at the outlet. There is a sign saying to keep off the dam, so I turned right and went around the pond this direction before popping over onto the access road which you can follow the short way back to the parking area.

Given the weather to start the day, the length of the route, and the trails picked for the route this was a nice hike for a longer route. There weren't many people that I ran into and I didn't see a single person after passing Unknown Pond. The water on the trail was the biggest detractor of the day, but I still enjoyed the hike and added approximately 6 miles of new trails for the day of redlining.

Following the brook near the bottom of Mill Brook Trail

Given the weather to start the day, the length of the route, and the trails picked for the route this was a nice hike for a longer route. There weren't many people that I ran into and I didn't see a single person after passing Unknown Pond. The water on the trail was the biggest detractor of the day, but I still enjoyed the hike and added approximately 6 miles of new trails for the day of redlining.

Google Earth representation of the hike


For all the pictures from the hike, just go HERE


Monday, December 25, 2023

Lakes of the Clouds Hut, Mt. Monroe (5,384 ft), and Mt. Washington (6,288 ft) 7-22-23 thru 7-23-23

DAY 1
Distance: 4.42 mi.
Elevation: 2,484 ft (overall) 2,603 ft (total)
Time: (with a 9 year old setting the pace) 2:34 (Gem Pool) 5:33 (Hut)
Trails: Ammonoosuc Ravine Trail

Once my oldest daughter was able to see one of the AMC's huts in person, she wanted to stay at one. So for Christmas last year I surprised her with a reservation for the two of us at the Lakes of the Clouds Hut. The plan would be for us to hike up to the hut on the first day, then hike up Mt. Monroe and Mt. Washington the second day before hiking back down to the truck.

Since we only had to make it to the hut in time to check in before supper, I wasn't worried about our pace and the way up and let my daughter set the pace the entire time. The hike from the Ammo parking lot to the junction just above the base station seemed to go pretty quick for a 9 year old who is just getting over being sick setting the pace. The trail is easy to follow and has nothing really difficult about it other than maybe the 1 brook crossing. Water wasn't super high today, so it went well with my daughter just wanting a hand to make sure she didn't slip off the logs that we used to walk across the water.

The first and biggest brook crossing of the day

After the junction near the base station the trail got a bit muddy (lots of rain this summer and more this week) and a bit rockier. The trail follows right next to the river which is neat (I always like a trail next to a river/brook), but this does mean it can get narrow if the bank is steep. There is also a reroute being worked on at this time to avoid part of this as there is a section of trail that is getting eroded by the river. I didn't get a picture of this section because it was lightly raining at the time. About halfway to the Gem Pool we did start to have some very light rain today. It wasn't enough for me to put on my rain jacket, but I did put on my pack cover so all of our clothes, camera, and other stuff for the night would stay dry. My daughter put on her rain jacket, but mainly because the cool mist on her arms was making her a bit colder than she would like. By the time we reached the Gem Pool, the rain was done for the day, even though the clouds and fog remained.

Liliana at Gem Pool

After taking a nice break at the pool and having some snacks, we started the steep climb up to the hut. I had only done this trail in winter so far so I didn't know how rocky the trail would be, just that it was going to be steep almost all of the way to the hut. Because it was going to be steep, I made sure to let my daughter set the pace so we wouldn't get her to tired at any point.

A small ladder high up on the trail

The trail above the pool was about as rocky as I would have expected given how much use it sees and where it is located. There were also some spots I thought were fun as they were a bit scrambly. My daughter seemed to like them too, but she is a fan of things like that as well. The only real difficult parts are the places where the trail has some water flowing down it or you it crosses the brook higher up. Some of these spots just make for possibly tricky footing.

Liliana enjoying herself near the falls above the trail

As the trail starts to level out some near the hut, Liliana thought it was fun hiking in the clouds, but she was also really looking forward to getting to the hut so we could take a break, but more importantly she could pick out her bunk bed. Just over a hundred feet from the hut it was still so foggy that she couldn't see the hut. I was able to just make out the top of the roof line through the clouds, but only really because I had been there before. Liliana was excited to be so close, but wasn't happy I was spending times taking pictures of us in the clouds instead of going inside.

Even though you can't see it, we're there

Once inside, we checked in and went to our bunk room. Our room had bunks that went 3 levels high and Liliana was thinking the whole trip she wanted the top bunk. She climbed up to the top and checked it out, but in the end decided she didn't like being that high up and choose to take the second bunk with me below her. This is still about as high as a normal bunk bed anyways. After we set out all of our gear we were going to need in our bunks, we got some hot choculate and checked out the rest of the hut. Once ready, we had a great meal and were able to talk with some other nice hikers. After supper we played some card games and a couple rounds of Jenga after watching a couple have a truly impressive game of Jenga that ended with a very tall stack and almost no moves left over at all.

Checking out the view from the top bunk

Google Earth representation of the the first day

DAY 2
Distance: 9.2 mi.
Elevation: 1,207 ft (overall) 1,894 ft (total)
Time: (with a 9 year old setting the pace) 0:37 (Monroe) 1:09 (Hut) 3:44 (Washington) 9:36 (Cog) 9:57 (Total)
Trails: Mt. Monroe Loop, Crawford Path, Trinity Heights Connector, Gulfside Trail, Jewell Trail, Base Station Road

Day 2 and we are ready to hit the summits of this hike. After a hearty breakfast at the hut, we packed up our gear and went outside. We a couple parting shots of Liliana and I in front of the hut before we headed up to Mt. Monroe. There was a mix of sun and some high clouds to start the day, but the forecast was for increasingly better conditions. We had a good amount of sun for our short-ish (I do have a 9 year old with me) hike up to the summit of Mt. Monroe. As we got to the summit, the wind picked up some and we had some clouds just a little bit above us. The wind was enough that we both put on a layer to stay warm on the summit. Liliana was super excited to be on top of the first peak of the day and her first 5000 footer.

The two of us ready to leave the hut

Liliana on the summit of Mt. Monroe

We enjoyed some time at the summit, but we knew that we couldn't spend all morning here as we needed to hike back down past the hut and then up the steady rocky climb to Mt. Washington before making the long hike back down to the truck. The hike back down to the hut went well with the one steep spot requiring Liliana to climb down facing the rock instead of away from it so that she felt more comfortable. Soone enough we were back to the hut for a quick bathroom break before climbing up Mt. Washington.

View south from Mt. Monroe

Looking back down to the hut

As we started our climb up Mt. Washington, the summit was still in the clouds. But as the forecast predicted, the clouds got higher and thinner the longer we climbed. The trail is easy to follow here despite being completely on the open rocks. Liliana was doing well setting the pace, but was a little more tired than I had hoped for. This was her first multi day hike though, so I couldn't complain too much. We saw lots of other people on the trail with many of them giving Liliana words of encouragement and saying how good she was doing for her age.

Looking up towards the summit of Mt. Washington

By the time we were probably three quarters of the way to the summit of Mt. Washington the clouds had cleared and we had great views all around us. We really did luck out considering this trip was planned 8 months ago. As we neared the summit, things were getting busier and our pace was slowing some. It wasn't until we had been at the top for a little bit that I noticed it was already about 2pm, and we still had more than 5 miles back to the truck. As much as we both wanted too spend more time at the summit, we cut it shorter than planned. We were still able to check out a lot of things, rest some, and replenish our water, but we had a lot of hiking to do still. So we walked close to the summit, avoiding the long line, so that between people taking pictures Liliana could walk over the high point of the mountain (making it official of course). We then went just past the summit sign and took pictures with a nice view in the background instead of at the sign.

Liliana on the summit of Mt. Washington

After our photos, we headed for the Great Gulf and Mt. Clay. The plan was to climb down the Jewell Trail back to the truck making for a nice loop while getting my a few miles of Red Lining as well (I hadn't done the Jewell Trail before). Coming down the rocky terrain towards the top of the Jewell Trail proved to be a little bit harder for Liliana than I thought it would be. Her feet were starting to get sore and climbing around on rough terrain was a bit harder for her. In her defense though, we had been walking on solid rock all day though and in the end she was still making good progress.

The view north from just below the summit of Mt. Washington

Liliana working her way down the mountain

For me, the highlight of coming down this way is the view into the Great Gulf from the trail as it goes right around the top of it where it drops steeply off down from the ridge. To me this is the best place to get a real sense of just how big the gulf really is. Liliana also really liked this area and it was great to spend some time here taking a break with her.

Looking out over the Great Gulf

After our last short climb around the back side of Mt. Clay, we finally hit the Jewell Trail and were ready to really start the descent. By this time, we were also starting to feel the effects of being above treeline in the sun and we could tell our foreheads were getting a bit red. I don't do the best with sunscreen, and I forgot all about it again today with Liliana since we started in the clouds. Even though we were late to do so, we did put some sunscreen on now to keep things from getting too bad.

Looking back over to the hut from the Jewell Trail

I know lots of people like hiking these two peaks together using the loop we were doing, but to me I was dissapointed in the Jewell Trail. I'm not sure what I was really expecting from it, but I found it felt like it wandered a bit too much and really could have used a few more small cairns and a few blazes on the rocks would have been nice in some spots as well. While on open rocks, the trail at times makes a turn and the only real indication of this is paying attention to how much wear and tear there is on the surface of the rocks. Coming down one field of rocks, we saw the group in front of us and behind both go straight when the trail made a left and followed the side of the rock field. This resulted in the other hikers wandering around not sure where the trail was or where they were going until they found a way out by trampling over the fragile vegetation above treeline. In this case, there was a wide and very beaten path over and through the plants that will likely never recover.

Descending the Jewell Trail

Once we got to the treeline we were happy to be in the side and took a small break since our sunburn was starting to affect us some. Luckily the trail becomes smoother and eventually not as steep as well. This meant my daughter was enjoying it a bit more and we were able to pick our speed up some. To pass the time and try to keep ourselves going through this section, my daughter would ask random questions and we would then discuss the subject until another came up. When we got to the split where we could continue down the trail to the parking lot and use a bridge to cross the river or go left and wade through the river at the base station for the cog railway, I let my daughter make the decision. I had checked out the water level a week ago and knew about how deep it should be. I explained our options to her and reminded her that as soon as we crossed we could change into the crocs we brought for the night at the hut and use them to walk back to the truck. With feet that were getting sore, she decided we should use the trail to the base station and she could get her looser fitting crocs on that much sooner. She was a bit nervous when it came to the actual crossing, but I helped her all the way across and in the end it really wasn't that bad. After changing shoes on one of the benchs, all we had left was the walk back to the truck as things got darker out because the sun had gone down.

Google Earth representation of the the second day

TOTALS
Distance: 13.62 mi.
Elevation Gain: 4,497 ft (total)
Time: (with a 9 year old setting the pace) 15:30


For all the pictures from the hike, just go HERE

Saturday, November 11, 2023

Mt. Eisenhower (4,780 ft) 7-15-23

Distance: 7.74 mi.
Elevation: 2,600 ft (overall) 2,851 ft (total)
Time: 2:38 (Crawford Path) 2:59 (Summit) 3:12 (Crawford Path) 3:35 (Edmands Path) 5:26 (Total)
Trails: Edmands Path, Eisenhower Loop, Crawford Path, Edmands Path

With a two day hike planned next week with my oldest daughter, I wanted to get in another hike to make sure I was ready. I have been wanting to hike Mt. Eisenhower via the Edmands Path for a while, so today was a good time to do so. I needed the Edmands Path for redlining and was also going to do a loop around the summit so that I could redline the section of the Crawford Path between the two ends of the Eisenhower Loop.

The trail starts off pretty flat giving you a little bit of time for your body to warm up before doing any real climbing. Today was a bit cool for July, but high humidity meant all the plants along the trail were almost dripping as the morning started off. Before the trail does any real climbing in elevation there is one brook crossing that could be a bit tricky with high water. But even with how wet this summer has been, I as able to easily cross it with dry feet using the rocks sticking up out of the water.

The first and biggest brook crossing of the day

AFter the brook crossing, the trail slowly gets steeper and starts gaining more elevation while mixing in a combination of rocks and or roots at time. Even higher up, the trail is more of a steady rocky climb. The trail even passes through an interesting corridor of thicker trees on each side while it starts to work towards the left as it climbs. While doing this, the trail is on more of a sidehill rather than heading straight up through the woods. Early on in the sidehill section there is also another small brook that crosses the trail. Being so high up on the mountain, this brook was quite small (especially today) which made it very easy to get over.

A slightly slick exposed slab of rock in the trail

A nice straight corridor climbing steadily

Continuing along the side of the mountain, the trail soon levels out and follows its way around towards the main ridge of the Presidentials. Being on the side of the mountain, the trail does get pretty narrow through here since there isn't much room for it to be any wider than it is. This did make for an interesting section of the trail and also gives you a nice break from the climbing. Just before you get close to the ridge, the trail passes over/through a small talus field with a flat(ish) path leading through it. Just past this is the next intersection where you come to the main ridge of the range and the Crawford Path. I took a little break in this area before making the last push up to the summit.

Small talus field just before the ridge

The climb up to the summit starts off a bit steep and rocky, but as you get closer to the the summit the trail levels out more and more. The summit of Mt. Eisenhower is shaped a lot like a big rounded dome. And since it isn't a very long distance to the summit, the last climb up onto it goes by pretty quick I think. On the summit there were nice views today, although the clouds weren't that much higer than the summit itself. There were even a few points where there almost wasn't a view because of being in the clouds on the summit. It was also interesting seeing a few very small rain showers happening in a few places off in the distance.

Nearing the summit

A little bit of raining coming up the western side of Mt. Washington

The clouds were just above the summit

Mt. Eisenhower summit

Instead of heading back down off of the summit the same way I came up, I continued over the summit to make a loop out of it. After coming down from the summit to the Crawford Path, I needed to take a left so that I could redline the short section of the Crawford Path that goes between the two ends of the Eisenhower Loop Trail. This was a quick and interesting section of trail that made for a nice and interesting loop around the summit. It stays mostly flat with some rocky bits, and has only one section that could be a little bit tricky if it were too wet. The trail makes a quick little drop down then climb back up while on a bit of an angle from the sidehill that it is on. With decent conditions, this section shouldn't pose any real problems though. And before I knew it, I was back to the intersection with the top of the Edmands Path.

Looking towards Pierce coming down from the summit

Once at the top of the Edmands Paths again, there were some interesting clouds starting to roll in and over the presidential range. There also appeared to be a few more small rain showers coming our way. There were a prediction of scattered rain showers this afternoon so this wasn't a big surprise. I decided to not waste too much time before going down or on the way down so that I could try to stay as dry as possible on the descent.

Interesting clouds ready to head down Edmands Path

Looking north up the Presidential Range

The trip coming down was mostly uneventful. The trail was just how it was on the way up, although I didn't get lightly sprinkled on with rain a couple times on the way down. I also had the chance to talk with a nice man from the forest service that was out doing trail maintenance cleaning up trees that were down on the trail. On the way down the trail I also made the decision not to do any of the short little hikes around the Crawford Notch area that I had come up with to get some more redlining down on short trails that don't lead to any peaks. It was just so humid today that I had done enough sweating already and didn't want to do more. Even though temperatures were low for the middle of July, the humidty was high and there just wasn't much of a wind to make it any better.

Google Earth representation of the hike

For all the pictures from the hike, just go HERE


Saturday, October 14, 2023

Black Mountain (2,830 ft) 5-27-23

Distance: 5.2 mi.
Elevation: 1,258 ft (overall) 1,347 ft (total)
Time: (with a 4 and 9 year old setting the pace) 1:53 (Summit) 3:41 (Total)
Trails: Black Mountain Trail

Our daughters wanted to do a family with all of us together so I went to the NH 52 With a View List and picked a peak none of us had done. This list is full of peaks below 4K feet and they have have views from the top (as the name implies). With our youngest daughter being 4 years old, I needed to pick a peak small enough that she would be able to hike it. Black Mountain looked like it would be short enough and have a gradual enough incline that she would be just fine. This was the case and it turned out to be a great hike that hikers of all ages and abilities should be able to do.

The hike starts off at a small parking lot by following a woods road. After a little bit of hiking you will come to a fork in the road where you will want to go to the left. There is a sign with an arrow it that helps to let you know which way to go. After a little bit more hiking, the road will be blocked with large rocks to keep any on/off road vehicles from going any further. The path gets just a little bit steeper here, but still is quite gentle by White Mountain standards. At the end of this last bit of woods road is a very small brook crossing (step over really) and an opening in the trees. The trail bears to the left in this opening and enters back into the woods becoming more like an actual hiking trail than a road.

Take a left at the fork in the roads

The nice wide trail after the clearing

Now that the trail is off the road it gets a bit narrower, more rocky, and a bit steeper. It still stays pretty gentle with good footing. As it gets closer to the summit, the trail does get as narrow as most trails in the whites and has a brief steeper section. I was ahead with my 9 year old while my wife was just behind with our 4 year old. My 9 year old wanted to race up ahead and try to get to the summit by a certain time for a game she was playing by herself. Both of our daughters were able to handle this section quite well as I would expect most hikers could.

Painted Trillium along the trail

This mountain has two trails that lead up to the summit and they both meet at an intersection within about 100 feet of the summit. At this intersection we turned left and went straight up through the trees. There is a direct path to the top or a more gradual path further to the left. As soon as you pop up onto the summit, you are presented with the nice view to the east which includes Mt. Moosilauke. There are some areas around the summit to explore as well. If you go to the left over the open rocks you get to another more limitied view that looks over towards the Cannon Mountain and Franconia Notch area. A small path leads to the right as well that heads over to a nice open area that gives even more views including to the west and south.

View of Mt. Moosilauke from the summit

View point on the southern side of the summit

Family photo from the more limited view point on the north side of the summit

The view towards Franconia Notch

After ample time at the summit to soak up the sun, rest, and have some tasty snacks we explored all the open areas around the summit to check out the views. By checking out all of the areas we were able to gets lots of views in almost every direction. Views to the south and east were best, but there are some good views west too withe limitied views to the north. The girls loved exploring the area and running around on the exposed rocks. Once we had explored everything, the kids took the lead in our hike back down to our car. The trail was easy to follow so they had no issues being in the lead and setting the pace.

The girls leading the way down the mountain

As you get further down the trail it gets smoother, wider, and more flat. It is pretty easy to follow and if you came up this way, you should have no problem making it back down the same way. I picked this trail for climbing the mountain based mostly on how well I thought my daughters would be able to do on it. Our youngest has only done one other hike on the 52 With a View list and I didn't want to pick anything too big or difficult for her. Both routes looked good for this peak, but I choose to come up from this side in large part because it was slightly longer and it would give me just a bit more distance for redlining this year which is something I am planing to focus on more this year with my hikes. While I think the old kilns near the other trail for this peak would be fun to check out, I wasn't sure everyone would have the focus needed today to do the hike and explore other things. I wanted to make sure the hike went well so I choose not to have the distraction of the kilns. Eventually I will need to hike that trail for redlinging as well, and we could go check them out at that time. Doing the hike this way ended up working out very well with everyone doing fine and having a good time.

The brook crossing starting back onto woods roads

Star Flower along the trail

Google Earth representation of the hike

For all the pictures from the hike, just go HERE